 |
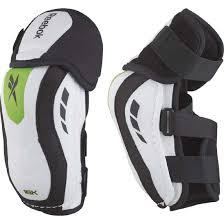
Elbow Pads |
| These short pads begin at the bottom of the shoulder pads on the players' arm and should extend to the top of the gloves. |
|
| |
| Proper Fitting: |
- Measure the length between the shoulder pad and the cuff of the glove.
- Match the player’s measured size to the size of the elbow pads by inches. The sizing chart provides an alternate method.
- When fastened securely, there should be no gap between the pad and either the biceps extension of the shoulder pad or the cuff of the glove. Players who wear a short cuff style glove should choose the longer model of elbow pad.
|
|
| |
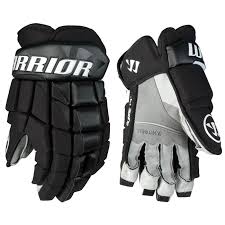 |
Gloves |
| Look for a good fit that allows your child to grip their stick. A single layer of foam inside the glove, coupled with coverage to the middle of the forearm is suggested. |
|
| |
| Proper Fitting: |
- With the player’s forearm bent, measure the distance between the fingertips and the elbow pad.
- Select gloves from the sizing chart with the corresponding inches and corresponding level of play.
- Gloves must fit properly. Gloves that are too large will inhibit your ability to properly feel the stick, and if too small will jam your fingertips to the end of the gloves.
|
|
| |
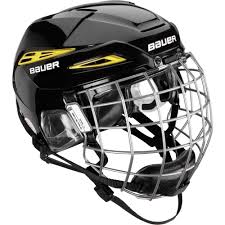 |
Helmet |
| Helmets and facemask are mandatory in minor hockey. A proper fit ensures maximum protection. Look for the CSA certification label prior to purchase. |
|
| |
| Proper Fitting: |
- Place a tape measure 1” (2.54 cm) above the eyebrows and measure the distance around the head.
-
Select a helmet with the corresponding inches and corresponding level of play. Open your helmet to its largest setting. Position the helmet on the head so the rim is one finger width above the eyebrow. Gradually begin to downsize the helmet (if necessary) until a comfortable snug fit is achieved. Tighten and secure the helmet adjustment. The helmet must be snug enough to prevent rotation with the adjustment secure and the chin strap securely fastened at all times. An oversized helmet can lead to unnecessary injuries.
-
Hockey faceguards should match helmet model and size and must meet CSA Standards, and must be approved for use with the helmets to which they are attached. Models:
-
Type I – for players 10 years or older (excluding goaltenders), denoted by a white CSA sticker.
-
Type II – for players 10 years and under (excluding goaltenders), denoted by an orange CSA sticker.
-
Type III – for goaltenders of any age, denoted by a blue CSA sticker.
-
Type IV – for players at the Major Junior
|
| |
|
| |
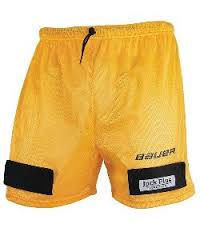 |
Garter Belt & Cup |
|
Sometimes the "cup" requires a separate garter belt. This belt provides a mechanism to keep hockey socks in place. Opt for the shorts with velcro on the front and back as these wear better and are more comfortable for the player.
Also known as a "jock" or "jane", boys should wear a cup and girls should wear a pelvic protector. Protect the "next generation". |
| |
| |
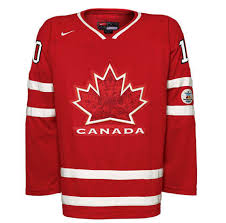 |
Jersey |
| Your young Gretzky/Gretzkyess may need a practice jersey for team scrimmages and hockey camps. Handy for the outdoor rink as well! |
|
| |
| |
| |
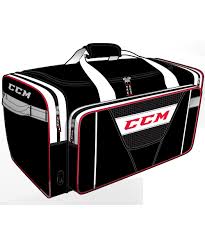
Hockey Bag |
 |
| |
Required for lugging all this gear back and forth from the house to the rink. Buy one with wheels. Consider it to be a gift to yourself. |
| |
| |
| |
Mouth Guard |
| Helps to prevent injuries to the mouth and teeth (and also prevents biting the tongue). Preliminary studies indicate that mouthguards also aid in the prevention of concussions. Stay away from the Eric Lindros model... |
 |
| |
| Proper Fitting: |
- An internal mouth guard may be attached to the facemask to protect the player’s teeth and to help reduce the risk of concussion. It is recommended that a dental practitioner fit the mouth guard.
|
| |
| |
 |
Neck Guard |
| An absolute must for minor hockey players. Available for around $15, these lightweight devices assist in lessening the chance of a skate blade cutting a player's neck. |
|
| |
| Proper Fitting: |
- The throat protector should be snug but not uncomfortably tight. It should completely cover the throat, and with the bib style the upper chest area. Measure the player's neck and match this size to the adjacent sizing chart.
|
|
| |
| |
| |
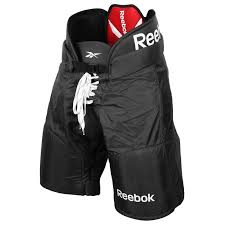
Pants |
|
| Hockey pants provide your child with added protection against shots, sticks and falls. If the pants fit well, they will not affect your child's mobility on the ice. |
 |
| |
|
| Proper Fitting: |
- Measure the player’s waist.
- From the sizing chart, select the hockey pants with the corresponding size for that model.
- ants should reach the top of the player knee and extend up to cover the kidney and lower ribs. The molded polyethylene hip, kidney and tailbone pads and foam padding should cover critical areas.
|
| |
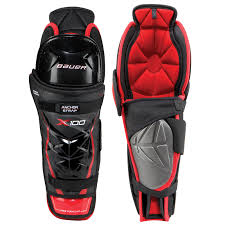 |
Shin Pads |
|
| Covering the knee and shin area, these mainly plastic pads should extend from the bottom of the hockey pants to the top of the skate boot. |
|
| |
| Proper Fitting: |
- Shinguards are measured best while the player is sitting.
- Measure from the center of the kneecap to the top of the skate boot.
- In the sizing chart, match the player’s shin size to the inches of shinguard. Player height is also shown in the chart and can be used as an alternate guide.
- Shinguards, which are either too long or too short, will result in the knee or instep being exposed and unprotected. Shinguards should be secured with shinguard straps or tape, never tight hockey stockings.
|
|
| |
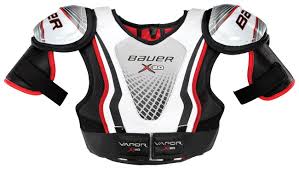 |
Shoulder Pads |
|
| A combination of foam and plastic padding with a good fit. |
|
| Proper Fitting: |
- Measure the player’s chest just below the arm pits.
- Match the player’s chest size to the shoulder pad that corresponds.
- Shoulder pads should fit snugly while the vital tips of the shoulder must be properly under the shoulder caps. The bicep pads should not interfere with the player’s elbow pads.
|
|
| |
 |
|
| |
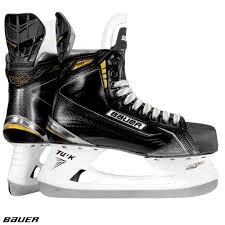 |
Skates |
|
| Priorities here should be value and comfort. Skates should feel comfortable right out of the box, and the blade should be stainless steel or carbon. A common mistake is to buy skates a size or two bigger than they need to be, hoping that junior will get an extra year out of them. Take advantage of local stores trade in policy for kids skates. |
|
| |
| Proper Fitting: |
- While sitting down, the skater should put the skate on and kick his heel back into the skate. The toes should barely touch the toe cap. Lacing the boot up, the heel should be continuously kicked back to ensure a tight fit.
- When finished lacing, get up and walk around. The foot should feel comfortable with the rear snug and resting on the foot bed. The toes should be extended flat.
- When fitting children, follow the above steps, allowing ½ size extra for growth. Anything over the recommended ½ size could result in premature breakdown of the skate.
|
| |
| |
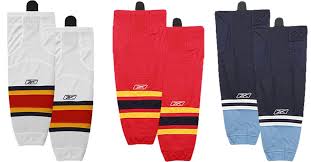
Socks
Used to cover the shin pads.
|
 |
| |
 |
Stick |
| A wood stick is suggested to provide your budding star with a better feel for the puck. 2 sticks should be readily accessible in case of breakage during a practice or game. |
|
| |
| Proper Fitting: |
- In street shoes, the stick should reach between the chin and the mouth of the player and just below the chin when on skates.
- Junior sticks should be used for younger players as these sticks have features, which are more suitable for this age group.
- When purchasing a goalie stick, the blade of the stick should be flat on the ice when the goalie is in a crouch position.
- Be aware of players’ personal preference when purchasing a hockey stick.
|
| |
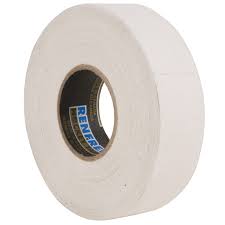 |
Tape |
| Required for taping the "handle" and blade of the stick. Many players use clear tape for keeping their socks in place as well. |

 Email
Email Print
Print

